Monday, January 2, 2012

Santa Cruz 3-day trip by Bike: Part 1--Quiet Christmas Day to Santa Cruz

(Here is the set of pictures on flickr for the whole trip. But I will break the write-up into parts)


We stayed around for the holiday season, and looked for a short trip locally where we can ride our bikes and relax some. Originally we were planning on going to Mendocino, but the threat of rain (which didn't materialize) and the lack of affordable accommodation steered us to look for an alternative location. In February we took the train and rode to Santa Cruz for an overnight trip, and had lots of fun. So we decided to see if we can stay do it again. In February, we rode to Santa Cruz from the San Jose Amtrak station, hung out, and then took the HWY 17 Express Bus back to San Jose. This time, we planned on riding over and back (on a different way) to San Jose.

Bikes on Amtrak trainBerkeley train station
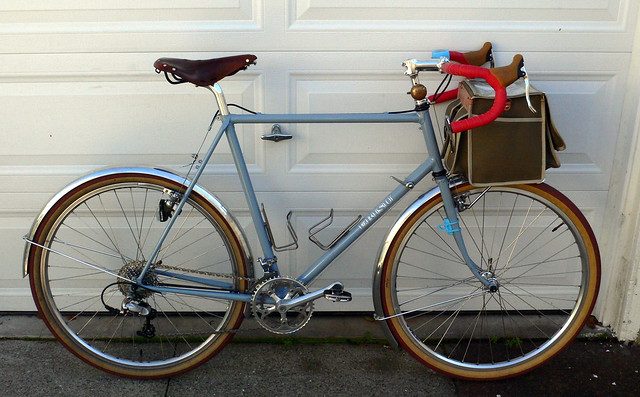
Christmas morning was very cold. According to the weather report when we left our house at approximately 6:30AM it was 30 degrees F. I took my Kogswell and pack all my stuff and some of M's stuff in the Ruth Works porteur bag that I got from Ely several months ago. The 15x12x12" bag can fit a lot of stuff, and on this occasion it contained my change of clothing, 8 seaweed rolls (made with brown rice, braised tofu, carrot and mushroom), a meal worth of soba noodles and a canister of home-made spicy sesame sauce, some energy bars, my camera, cellphone, iPod Touch, and wallet, a touring map, lock (both U and cable), and warm clothes (a wool sweater for me and a fleece for M). M is using her Trek 720 (650b conversion) for touring purpose for the first time. She carried a Sakaroo (made by Arkel) pannier with her change of clothing, a pair of street shoes (since she was wearing SPD shoes on this occasion), locks, a book, and our toiletry. Between the two of us we also carried 3 bottles of water in 3 Klean Kanteen bottles.


Trek 720 short tour setupMy bag at the startThe Amtrak train came online at 7:12AM, and we were fortunate to get floor racks for bikes. It was very quiet, as most people were probably still sleeping, and probably already at their destination for the holidays. San Jose was a little warmer, but the street was just as quiet. We rolled quickly through the first handful of miles until we got on to the Los Gatos Creek Trail, which is nearly 10 miles long and would take us to Lexington Reservoir. In February, even though we were riding at around the same time of the day, but tons of people were already out. This morning we hardly saw anyone besides flocks of ducks and geese. We traded pulls and move swiftly on this extremely pleasant trail. Both of us were wearing heart-rate monitors as we are training for some big rides this year and want to begin to build some base. We were doing 16-18 MPH and the heart rate stayed pretty low.


Casalegno's StoreClimbing Old Santa Cruz HighwayThe later stretches of the trail has hard-packed dirt as the surface, followed by a very short stretch of uphill and flat gravel roads. The last stretch is a path along the wall of the dam going up to the reservoir. We took off some layers as some climbing miles awaited. To get to Old Santa Cruz Highway, which is the road that will take us a long way toward Santa Cruz, we rode on a dirt path right next to the automobile-only Highway 17. The half a mile or so of dirt path, after a dry stretch in the weather was no trouble for our 650b tires. M commented on how she felt more assured riding her 650b'ed Trek 720 than she did in February when she was riding her 700c Trek 620.


Waves crashingRiding on Morrell RoadOld Santa Cruz Highway is a shaded, well-paved and winding road that has a gentle upward gradient from north to south. It was beautiful in the morning, and we saw one other cyclist on the road, and maybe a handful of cars. Sun is more prominent now, but under the tall trees we didn't feel any heat. We remarked how it must be nice to ride through this stretch in the summer. Another gem around this area is Ogallala Warpath Road, which is a smaller side road that runs parallel to Old Santa Cruz Highway for a short while. The road is even quieter, and takes us through a dreamy neighborhood among tall trees and lined with pine needles. After exiting the Warpath, we climbed a little further until we reached Summit Road.

Amazing Clouds
Beautiful cloud pattern Now we are on the ridge. We went southeast for a mile or so, heading toward Soquel-San Jose Road, which is what eventually would take us into Santa Cruz. However, we took Morrell Cutoff Road a mile or 2 prior to the intersection with Soquel-San Jose. Morrell Cutoff is a wooded back road with less than perfect pavement and some winding descents. On this trip it fits the motif perfectly. We saw lots of birds and people's backyards. Soon we came upon Soquel-San Jose. The road is a long and gentle descent down to the town of Soquel. We stopped at the Casalegno's Store as we did in February. We didn't expect it to be open, but we knew the store has benches outside for us to take a break and eat some food.

a little rock
Sun setting behind the cliffIt wasn't long after we began to roll again we entered the town of Soquel. It was noon at this point, and though more folks were out by now, it was still relatively quiet. We looked for the place we are staying for two nights--a room in a house I found on airbnb.com--and we were glad to find that the house was a block from the beach. Since it wasn't check-in time yet. We found a shady spot and watched the surfers tackled the waves for a while. It was gorgeous. After getting into our room and cleaned up a bit, we took a long walk along the water and stayed until past sunset. Given that it's Christmas night and most places were probably closed. We cooked the soba noodles we brought and made sesame noodles. It was a good day of riding and relaxing on the beach.

Sunday, October 30, 2011

M's 1982 Trek 720

Brown head tube and matching panel on seat tube
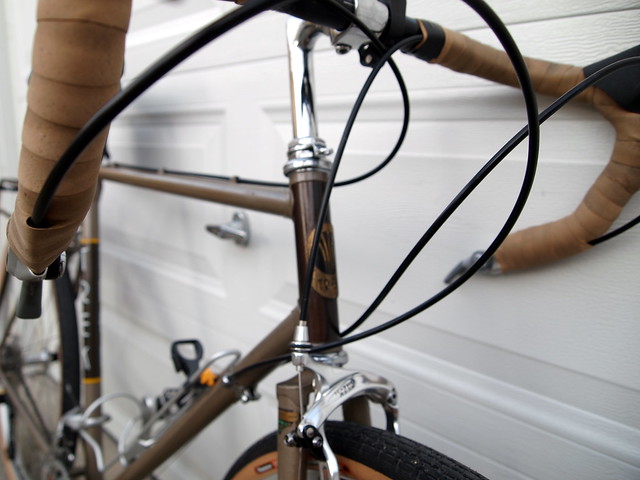
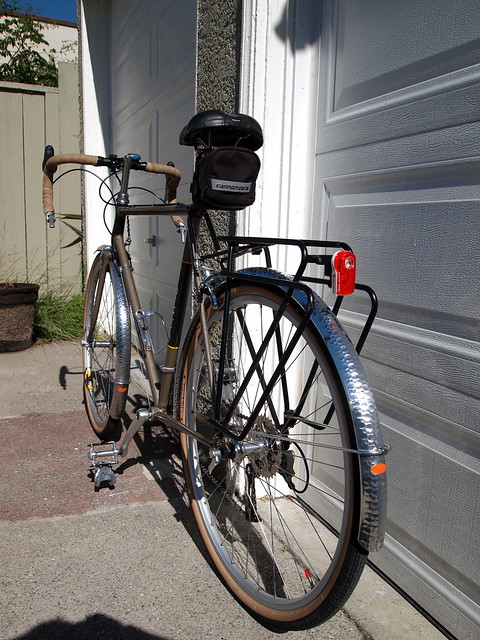
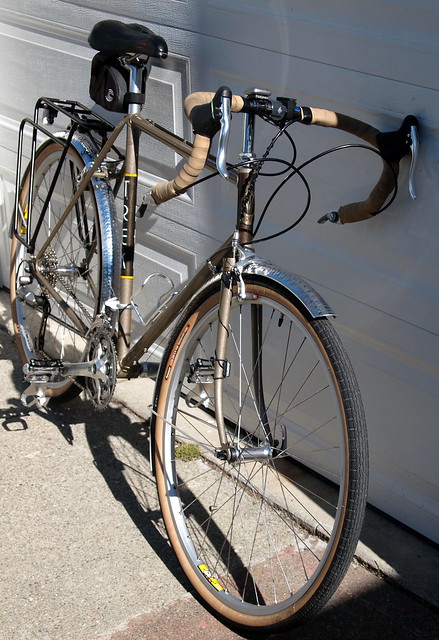
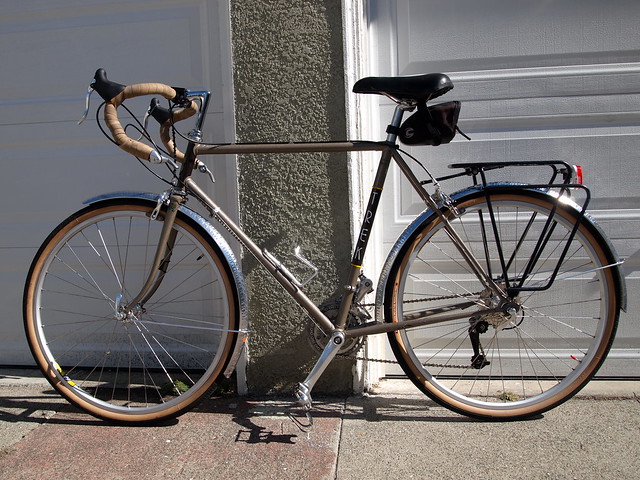
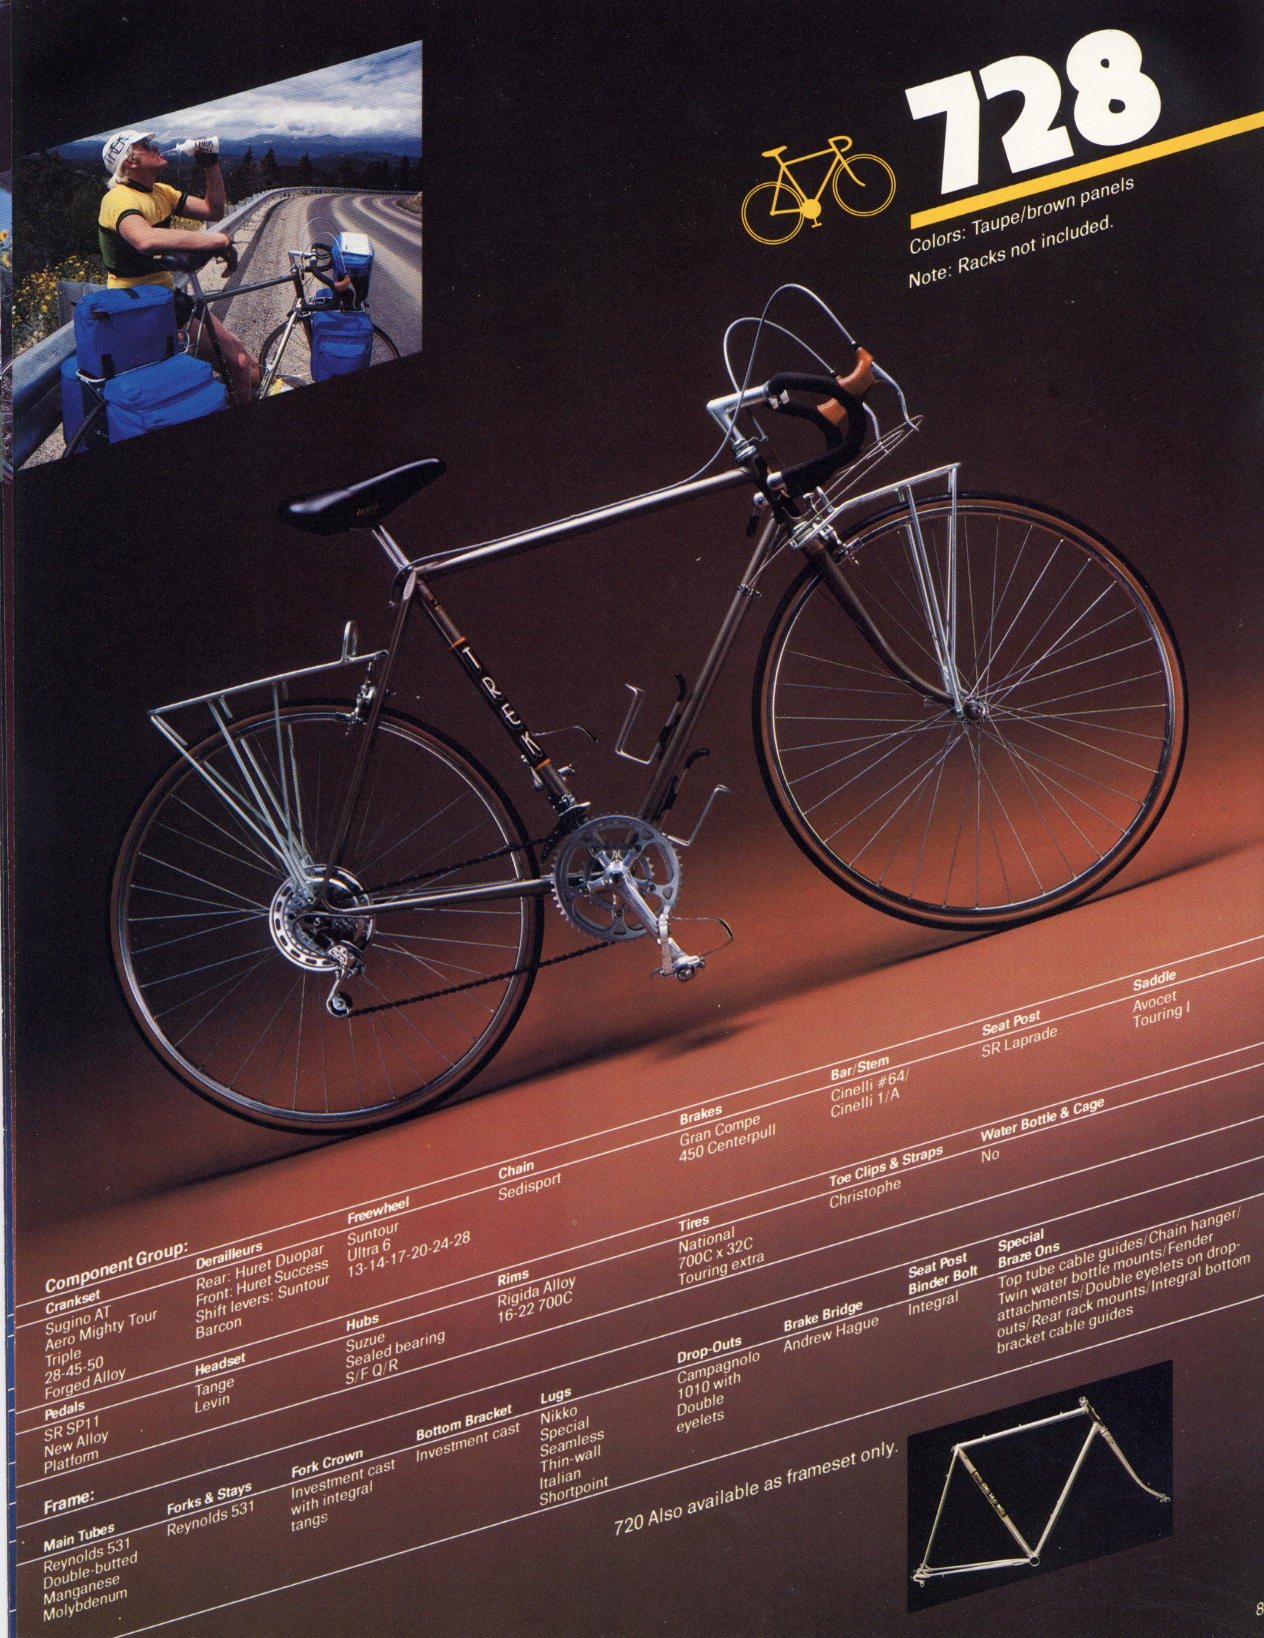
My wife M has been riding a 1984 Trek 620 touring bike as her daily commuter and errand-doer since late 2007. She has a special fondness for older Trek from that era, especially those with with a panel decal on the seat tube. I saw a 1982 version of a 720 for sale on the Internet forum recently that was her size (56cm) and snagged it up. It didn't have any decal that indicated that it was a 720, but the frameset looks identical to the picture in the 1982 Trek brochure, and the serial number under the bottom bracket shell (03081x) confirmed that the frameset indeed is a 82' 720.

The paint is in mostly good conditions. The taup paint on main triangle and most of the stays and forks still sparkle but significant paint chips can be found on the chain stays, especially at the kickstand area and the drive-side. I sprayed these areas with a satin-finish clear coat before assembling the bike. The frameset itself has some very nice details. The tubings (main triangle, stays, and fork blades) are Reynolds 531, with these following thicknesses and diameters (see this page in the brochure):

seat tube 8/5 1 1/8"
top tube 8/5/8 1"
down tube 10/7/10 1 1/8"

Unfendered here in a front 3/4 portrait
Both the top tube and the seat tube are 56cm (center-to-center) and the angles are 73.5 (seat) and 72 (head), which brings the handlebar and the seat closer to each other compared to M's other bike (the Ebisu Road), which has 73 degree for both angles. Other nice details of the frameset include integrated (and subtle) under-bottom-bracket cable guide, stamped "TREK" logo on the top non-drive side of the bottom bracket shell, a chain hanger, Campagnolo drop outs (front and rear) with double eyelets, Andrew Hague brake bridge with fender tap, and investment cast fork crown and bottom bracket shell. The chainstays are especially long (47cm) to provide a stable ride.

I had planned on building this bike to be a 650b conversion to allow use of metal fenders and wide tires. We sold M's 620 to a friend as a near complete bike (sans crankset, seatpost, front rack, and saddle), so I have to gather parts for the build. The most significant addition is a pair of wheels built by Charlie at Lakeview Bicycle, a new bike shop on the Lake in Oakland that stocks many BOBish parts. Other new parts include metal fenders, and chain and cassette. Most parts came from my parts bin. Here is the complete parts list:

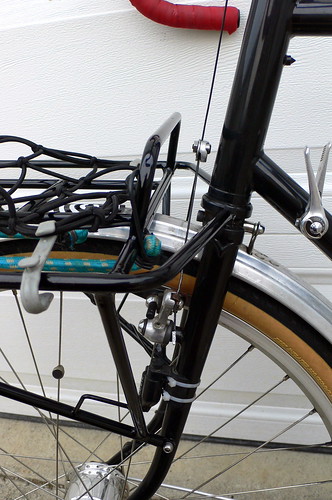
The Tubus rack on VO fenders
- 1982 Trek 720 frameset (Taup with brown panel and head tube)
- original headset (overhauled)
- Origin8 quill stem; 1"; 26mm clamp; 8cm reach
- Deda Newton 42mm handlebar; black; a gift from a friend
- Tektro R200 brake levers
- Shimano 9-speed bar-end shifters
- Soma tan bar tape
- Sugino XD2 165mm crankset 46/36/26T
- Shimano HG50 9-speed cassette 12-32T
- SRAM 9-speed 971 chain
- Tektro R556 long reach (55-73mm) sidepull brakes
- Shimano LX mega-range rear derailleur
- Shimano XT front derailleur
- Shimano Tiagra hubs laced to Weinmann ZAC19c rims; 32 spoke holes
- Panaracer Col de la Vie tires (measured 36mm on these rims)
- Shimano Ultegra seatpost
- Terry Liberator Ti saddle
- Tubus Logo rear rack
- Velo Orange hammered 45mm fenders for 650b wheels
- generic water bottle cage

The build is mostly pretty straight forward, but I did have to stumble through a couple of places:

1. the rear brake caliper barely reach the rim. Turning the adjustment screw helped some
2. similar to the 620, the chainstay bridge is placed too far forward to create a decent fender line. I used a 1/2" "spacer" to bring it closer.
3. Weinmann rims are a little oversized, so to mount the tires evenly I use soap water along the tire bead and inflate them to 110 psi before deflating it to the proper pressure. This seems to work OK; Charlie warned me about this before building the wheels up
4. I have to mount the rear fender stays on the Tubus rack (which has a pair of non-threaded eyelets on it) because otherwise the bolt will interfere with the chain when the chain is on the smallest cog.


M has enjoyed riding it so far and took it on a 12-mile ride last weekend. She doesn't notice a vast difference between the 720 and her old 620 (how can that be? the tires are much wider). I think the real test will come when we go on touring and when she has to ride through long stretches of bad pavement). It's really a nice bike. I am envious actually.

Monday, October 24, 2011

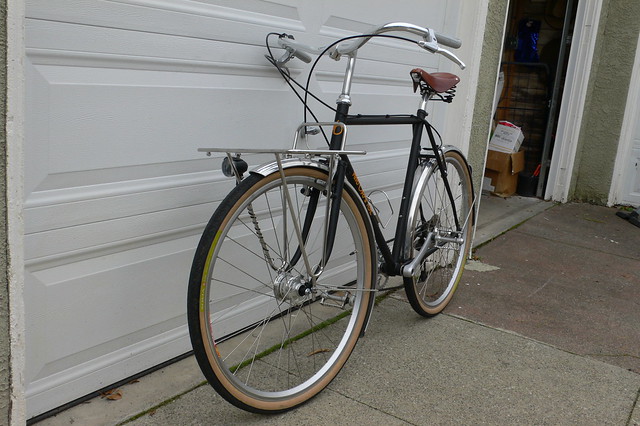
Andrew's VO Polyvalent Build

Earlier in the year I worked with my friend Andrew to build his city bike. I met Andrew at a local weekly social ride called the butterlap. He was riding his nice Moustasched Rivendell Sam Hillborne. We chatted up and found that we live pretty close to each other in Berkeley and his wife and I went to the same middle school in Taiwan! Andrew is happy with the Rivendell, but wants something more functional for his city-riding, especially since his last urban bike was stolen.

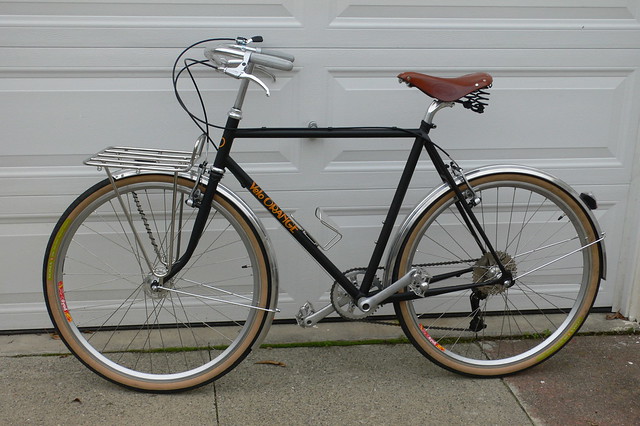
He chose the first-generation Velo Orange Polyvalent. He got a 54cm version from Box Dog Bikes in San Francisco. We talked over in length about his use of the bike and the parts suitable for those purposes. Here is a rough parts list:

-- VO Polyvalent frameset; 54cm (top tube 56cm)
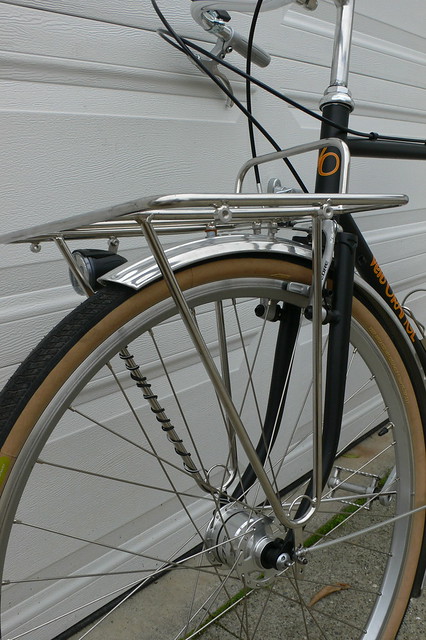
-- VO porteur front rack
-- 650b Dyad/Shimano LX Dynamo (equivalent to 3N80) front wheel built by Handspun
-- Dyad Shimano LX rear wheel (both wheels 32 spoke holes)
-- Busch and Muller nearfield IQ Cyo front light mounted below the rack
-- Velo Orange Zeplin 52mm 650b fenders
-- Soma B-line 650bx38mm tires (they measured 37mm on the Dyad rims)
-- Shimano LX rapid rise derailleur
-- Shimano HG-61 12-36T cassette
-- Shimano LX crank with single 40T ring (and no front derailleur)
-- VO Grand Cru setback seatpost
-- Brooks sprung saddle
-- Shimano LX V-brakes and mountain bike brake levers
-- Soma Oxford sweep-back handlebar
-- Raleigh old grey rubber grips
-- Single falcon thumb shifters mounted on the right side
-- Nitto technomic tall stem

More pictures here:


The build was pretty straight forward. The fenders and the V-brakes took the most time, the latter because it was the first time I installed V-brakes. I mounted the VO porteur rack to the rear-facing eyelets on the fork because it was designed to be mounted there and this way it allows the rack to be parallel to the ground and staying close to the head tube to reduce straining on the rack tab.

The finish product looks great, and Andrew has been riding it for 9 months and seems to be enjoying the bike. The 40T/36T combination is low enough for his purposes, and the light, rack, and fenders make it a very practical bike, especially in rainy Bay Area winters and springs.

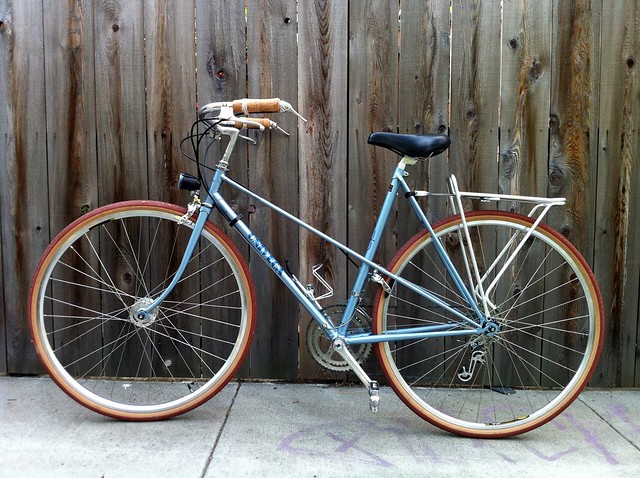
Rosalie's Univega Mixte Update

(Pictures taken by Larissa)
My friend Andrew introduced me to Rosalie, who worked with him, and used to be manage the Berkeley Farmers' Market. She bought a bike as an upgrade from her mountain-ish hybrid bike. The bone of it--early 1980's Univega Mixte--is very good, and we were able to keep several key parts, but significant upgrades were required and demanded. The parts we kept are:

Suntour derailleurs, Sugino double crankset (and the bottom bracket), the original headset, the Weinmann brake levers, and the beautiful metal coil cable housings for the front and rear derailleurs.

We bought 700c wheels--front is a Shimano LX (equivalent to DH-3N80) dynamo hub laced to Mavic A319 rim, and the rear is a (black) Shimano 105 hub laced to a Mavic Open Sport rim. We got an 8-speed cassette and two brick-red Soma Express tires (with Pasela tread). The quill stem is old, but wasn't installed on the frameset, and the handlebar is Soma Oxford.

The difficult part of the built was the shifters. Originally I thought about reusing the clamp-on downtube Suntour shifters that were already on the bike. However, these shifters are keyed to the clamp and can't be used independently. I found a pair of suntour friction downtube shifters that can serve the purpose to go with the bar-end pods. To use bar-end shifters with Oxford/Albatross bars one needs to have a way to recess the derailleur cable housings. We bought a pair of pre-grooved cork grips from Rivendell, which is glued to the handlebar and the housings recessed and tied with twine.

The drivetrain otherwise works well. The crankset has 52/42T rings, but the cassettes goes all the way to 32T, and the 42/32T combination should be low enough for most purposes.

We bought a pair of Tektro long-reach brakes (47-57mm) for the build and were almost foiled. The bike takes 27" wheels originally, and we created more clearance and tapped into better and more standard tire selection by going to 700c. However, the shrinking of wheel diameter by a mere 8mm almost made the rear rim not reachable by the Tektro brakes. I mounted the brakes on the lower seatstay, and facing the front. I then use Koolstop thin-line brake pads for V-brakes in place of the stock road cartridge brakes. The thin-line pads made it work. I could probably play with the adjustment screw on the caliper to give it a little more breathing room, but it works for now.

The Busch and Muller IQ Cyo head lamp, which is driven by the Shimano generator wheel, is mounted on the brake hole. Rosalie bought the near-field version to illuminate the area in front of the bike more.

The final touch came in the form of a old Terry saddle, with a long-haired woman wearing a dome helmet as the logo on the side. These old Terry liberator-type saddles are very comfortable, and my wife swears by them.

Unlike bikes I built for myself, I didn't try to ride the bike too much (it was too small), but hopefully I will get a more detailed report from Rosalie once she is settled and has more chance to ride it in San Diego.

Sunday, September 11, 2011

Another Old Specialized--the build

I had an old Specialized Expedition Deluxe touring bike from the 80's for a while. I trained for and then rode the 2007 Seattle-to-Portland ride on it. It was my main ride for a while, even edging a Romulus I had at the time. I didn't know as much about bikes as I do now, but the standard-sized diameter tubes it has probably contribute to the responsive yet supple ride quality it has. In Fall 2008, I sold it to fund the down payment of my Ebisu All Purpose, thinking that I would keep the Romulus alongside the Ebisu. I ended up selling the Romulus later also, and learned and changed somewhat my preference of bikes--toward bigger tires mostly on 650b wheel size, standard-diameter tubing, and higher offset at the fork. I am really happy with 2 out of 3 in my stable--the Ebisu and my Kogswell P/R, but have moved through several bikes as the third--my Romulus, a Raleigh One-Way, a Rawland cSogn, and most recently a Rivendell Bleriot.

Bleriot racked and baggedI actually like the Bleriot quite a bit. It's an attractive bike that fits 40mm tires with fenders, and rides fairly well. It feels different from my Ebisu and Kogswell in that it had oversize tubes and lower fork offset, and I sit somewhat differently on it than my other two bikes even though they are the same size. The Bleriot was a capable climber that at times felt spriter than my Kogswell during off-the-saddle spirited climbs, and definitely more edgy on the descent. I had suited it up well, and had plans to keep it for a long time.
Sequoia, Red Bottle, Soy Latte
I changed my mind recently when I came across a Specialized Sequoia from the same era as my old Expedition. The previous owner had powdercoated the frameset (including a blackburn rear rack) but didn't go through with the build. I moved most of the parts from the Bleriot (except the wheels) to the Sequoia. And it is fitted with a pair of 650b Dyad/LX wheels, with the front a dynamo hub (DH-T660-3N, which doesn't seem different from DH-3N80, according to Peter White). The rear wheel has seen use on my Kogswell, but it became available when I built a 36h-Synergy/LX wheel to match up with the Kogswell's 36h-Synergy/SON20 front wheel. The Dyad dynamo wheel came from eBay with a near new Col de la Vie tire. A couple things stand out about these Dyad rims, 1) they are symmetrical both front and rear, and 2) tires measured wider on them. For example, the Col de la Vie tire, which is often measured to be 35.5mm on Synergy rims, measures 37mm on the Dyad.

The clearance on the frameset allows me to use 650bx37mm tires on it with 49mm Honjo Fenders. However, both the fork crown and the chainstays were too narrow for the fenders. instead of cutting the fenders to fit, I pressed the fenders to fit by fastening the 5mm bolts to the frameset. I put some rim tape to dampen the vibration that manifested as creaking noises during rides.

Front cable hanger hack
One of the quirks I had to deal with when building the bike is the tall original Specialized headset. The stack height is so large that I can't fit a steerer-mounted, spacer-based cable hanger for the center-pull brakes i intended to use on this bike. So instead, I rigged up this cable stop using a rear cable hanger attached to a stem-based bell-clamp. since I want to have a bell anyway, the clamp is actually functional there besides serving as the attachment mechanism for the cable hanger.


The bike rides great! I put about 200 miles in the first month since I built it up. The 650b fat tires plus the more flexy standard-sized tubes make for a comfortable ride, and the short and shallow but flared drops of on-one Midge keeps me pretty comfortable for long stretches of road. After testing it for a while, I will bring the bike to Ukiah where I work part of the week. It will be capable of going on paved or unpaved roads and let me get out even at night with its dynamo lighting.

Here is the part list:

Sequoia at Island Camp Site
-- Specialized Sequoia frameset with original headset; powdercoated by previous owner
-- matching color blackburn rear rack
-- Velocity Dyad/Shimano LX wheelset 650b 32h; front hub is a dynahub, similar to the DH-3n80
-- Panaracers Col de la Vie tires; measured 37mm on the Dyads
-- 8-speed sram cassette 11-32T
-- Velo Orange Chrome crankset 50/36T
--Shimano XT low normal rear derailleur
-- Shimano 105 double front derailleur
-- Laprade 26.6mm seatpost
-- Terry saddle
-- On-One midge handlebar, with 3 layers of cloth bar tapes
-- Tektro brake levers
-- Dia Compe Mod 750 center-pull brakes with modern brake shoe/pads
-- Suntour non-ratchet shifter on the right and silver shifter on the left; shifter housing under the bar tape
-- B&M IQ Cyo senso front LED lamp
-- Plant Bike Blinkie
-- Honjo 48mm fluted fenders
-- Velo Orange Front Constructeur Rack
-- Velo Orange Campangne boxy front bag
-- Rivendell Banana saddle bag
-- Velo Orange threadless stem 9cm 6 degree with VO stem adapter
-- Brass bell

Sunday, January 30, 2011

Ebisu Update Jan 2011

January 2011 Set Up
Now that I have owned and ridden the Ebisu All Purpose for a year and half on several brevets and long rides, I can really appreciate the attention to detail that went into the design of the bike. Besides the difficulty with fenders plus grand bois hetres tires (which was by design), everything else is pretty perfect. I saw recently that Rene Herse Bicycles began selling a model of Honjo fenders that are slightly shallower in profile and slightly wider at 51mm, so I decided to pick up a pair to see if I can improve the infinitesimal clearance I have on the combination of hetres and fenders on this bike.


clearance w/ old fenders
Clearance w/ new fenders
The fenders have Honjo's usual shine, and are visibly shallower. The installation wasn't so hard now that I have few times to practice. The clearance with them, still slight, is definitely an improvement over the 49mm fluted version (I passed that pair to the Kogswell, and now the Bleriot has the VO Zeplin). While I was at it, I also changed the bar tape from tan Soma tape to red Fizik perforated tape. Now it's ready again for the 2011 brevet season.

Sunday, November 14, 2010

Kogswell P/R with Roseland Porteur Rack

I installed a Velo Orange Portuer rack on my Kogswell in the summer, and rode it for about 4 months. The VO rack works very well, and looks excellent. The only complaint I have is that by attaching to the fork drop-out, it stiffens up the lower front end of the bike, and makes handling slightly more awkward, especially on fast winding descents. This is really being nitpicking. I also lament the fact that I can't use the fork crown braze-ons on the Kogswell fork intended for porteur racks.

Miles Whitmore of Roseland Cycles posted on the Kogswell yahoo group that he had enough tubings to make 5 more porteur racks designed to go on P/R's fork, and Roseland might not make these racks in the future. I emailed him to reserve a 650b version right the way. 10 days later, I met Miles in Berkeley not too far from my apartment--it turns out that Miles and his partner is moving Roseland down to Berkeley from Santa Rosa, and current works out of a garage a few blocks away--and grabbed the rack from him.

The installation seemed easy. The rack is designed to connect to the mid-fork braze-ons and the fork crown braze-ons. I threaded in the 5mm bolts to attach the rack at the mid-fork, then realize that the rack struts meant to attach to the fork crown braze-ons were not exactly on the spot. Also, the fork crown braze-ons on the Kogswell weren't tapped, so I spent some effort getting the thread on the 6mm bolt to catch. After some pulling, the rack went on the fork. I then drilled a hole on the fender to attach to the fender tap under the rack, and installed the B&M IQ Cyo on the light holder on the rack. I am also using a porteur rack bag that Swift Industries makes on the rack.

I have ridden around time to buy groceries, etc. on the bike, and it feels not much different than when I was using the VO rack. However, on several hilly workouts in the Berkeley Hills, the restored suppleness in the front end on fast descent is certainly noticeable--the bike feels spriter, more responsive, and I feel more confident taking a turn at high-speed.

It is comparable in weight as the VO rack, and its attachment to the mid-fork braze-ons instead of the fork drop-outs means that I can safely put this bike on buses whose bike rack uses a front-wheel-hook to secure the bikes. The only nitpicking complaint I have is that the light holder is placed too high--my IQ Cyo properly adjusted to illuminate the road barely not stick out beyond the rack platform. When the porteur bag sits on the rack, it places pressure on the top of the light. I might have to use a VO light holder to solve the problem. But otherwise I am really happy with the rack so far.